Build your course
Courses
Create a course, edit its details and settings, preview it as a student, publish or unpublish it, share its link, and delete it.
A course is a set of lessons sold or shared at one link. This page covers the course itself: its details, settings, publishing and sharing. For the lessons inside it, see Sections and lessons.
Your courses
Courses in the sidebar lists every course in the workspace, most recently updated first. Each shows its cover, status (Draft or Published), lesson count, price or access mode, and number of students. Switch between Grid and List view at the top right; your choice is remembered.
Create a course
- Click New course in the sidebar.
- Type a title in What are you teaching?, or leave it blank (the course is then called "Untitled course").
- Drop video files on the page or click Choose videos. Each video becomes a lesson, in file-name order.
To fill in the details first instead, click Start with a blank course, complete the form and click Create course.
Either way, a new course:
- is a private draft until you publish it,
- has one section called "Lessons",
- is set to Paid at 49.00 USD, with comments off.
The course page
Open a course to see its title band, with the status, price or access mode, lesson count, Comments on/off and Search listed/hidden. The band holds Preview as student, Share and Publish (or Unpublish), and these tabs:
- Outline: upload videos and arrange the curriculum. See Sections and lessons.
- Students: see Students.
- Analytics: see Analytics.
- Discounts: see Coupons and sales.
- Details: the course settings described below.
The Outline tab also shows a Last 30 days summary: students, new students, net revenue (paid courses) and watch time.
Course details
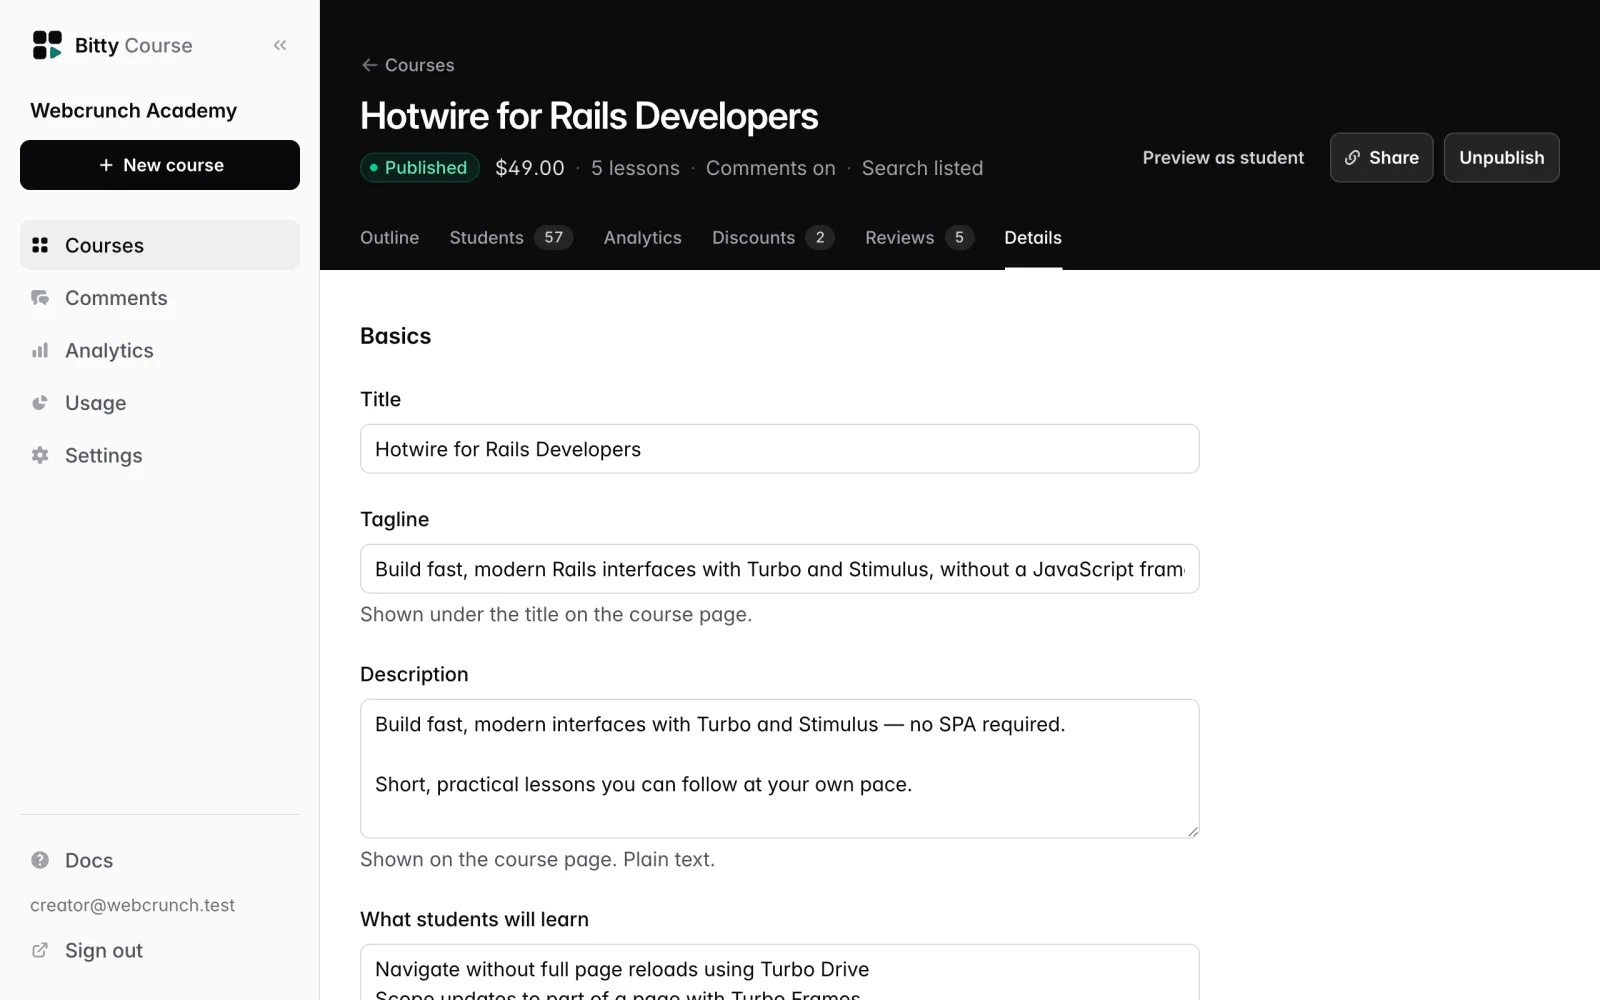
Open the Details tab, make your changes and click Save course.
Basics
| Field | What it does | Limit |
|---|---|---|
| Title | The course name everywhere. Required. | 120 characters |
| Tagline | One sentence shown under the title on the course page. | 160 characters |
| Description | Shown on the course page. Plain text. | 5,000 characters |
| What students will learn | One item per line, shown as a "What you'll learn" checklist on the course page. | 2,000 characters; only the first 12 items are shown |
| Cover image | Shown in the course list, on the course page and in link previews. | PNG, JPEG or WebP, up to 5 MB |
| Link name | The part of the course link after your address. | 80 characters |
Cover image. Use a 16:9 image at least 1280 × 720. It is optional: without one, a cover is made from your brand color.
Link name. It is created from the title when the course is made (for example "Rails for Beginners" becomes rails-for-beginners). It may contain only lowercase letters, numbers and single hyphens, must be unique in your workspace, and a few words are reserved. The link name locks the first time you publish, so the course link stays stable. It stays locked even if you unpublish later.
Access
Who can watch sets how students get in:
- Paid: students buy access. Set Price (at least 1.00, one-time purchase) and Currency (USD, EUR, GBP, CAD or AUD).
- Free: students sign up to enroll.
- Invite only: you add students.
Lessons marked free preview can be watched by anyone with the link. Everything else requires enrollment. Full details: Pricing and access.
Discussion, search and embedding
- Give a certificate of completion. Off by default. Students who complete every lesson get a certificate. See Certificates.
- Show student reviews. Off by default. See Reviews.
- Allow lesson comments. Enrolled students can ask questions and reply under each lesson. Off by default. Turning it off hides comments without deleting them. See Comments.
- Hide from search engines. Asks search engines not to list this course page. Anyone with the link can still open it. Invite-only courses are always hidden, and so is every course when your whole site is hidden from search in Settings → Course site.
- Sites allowed to embed lessons. One domain per line, up to 10. This only controls which sites may show the player in a frame. It never grants access: embedded lessons still require enrollment or a free preview. See Playback and security.
A course page is listed in search only when it is published, not invite-only, not hidden by you, and your site allows search engines.
Certificates
Turn on Give a certificate of completion in the course's Details tab. The course page then lists "Certificate of completion" under This course includes.
- A student gets one when they have completed every lesson in the course, while they have access. Before that, their progress card says "Complete every lesson to get a certificate."
- They click Your certificate, confirm the Name on the certificate, and click Get my certificate. The name can't be changed afterwards.
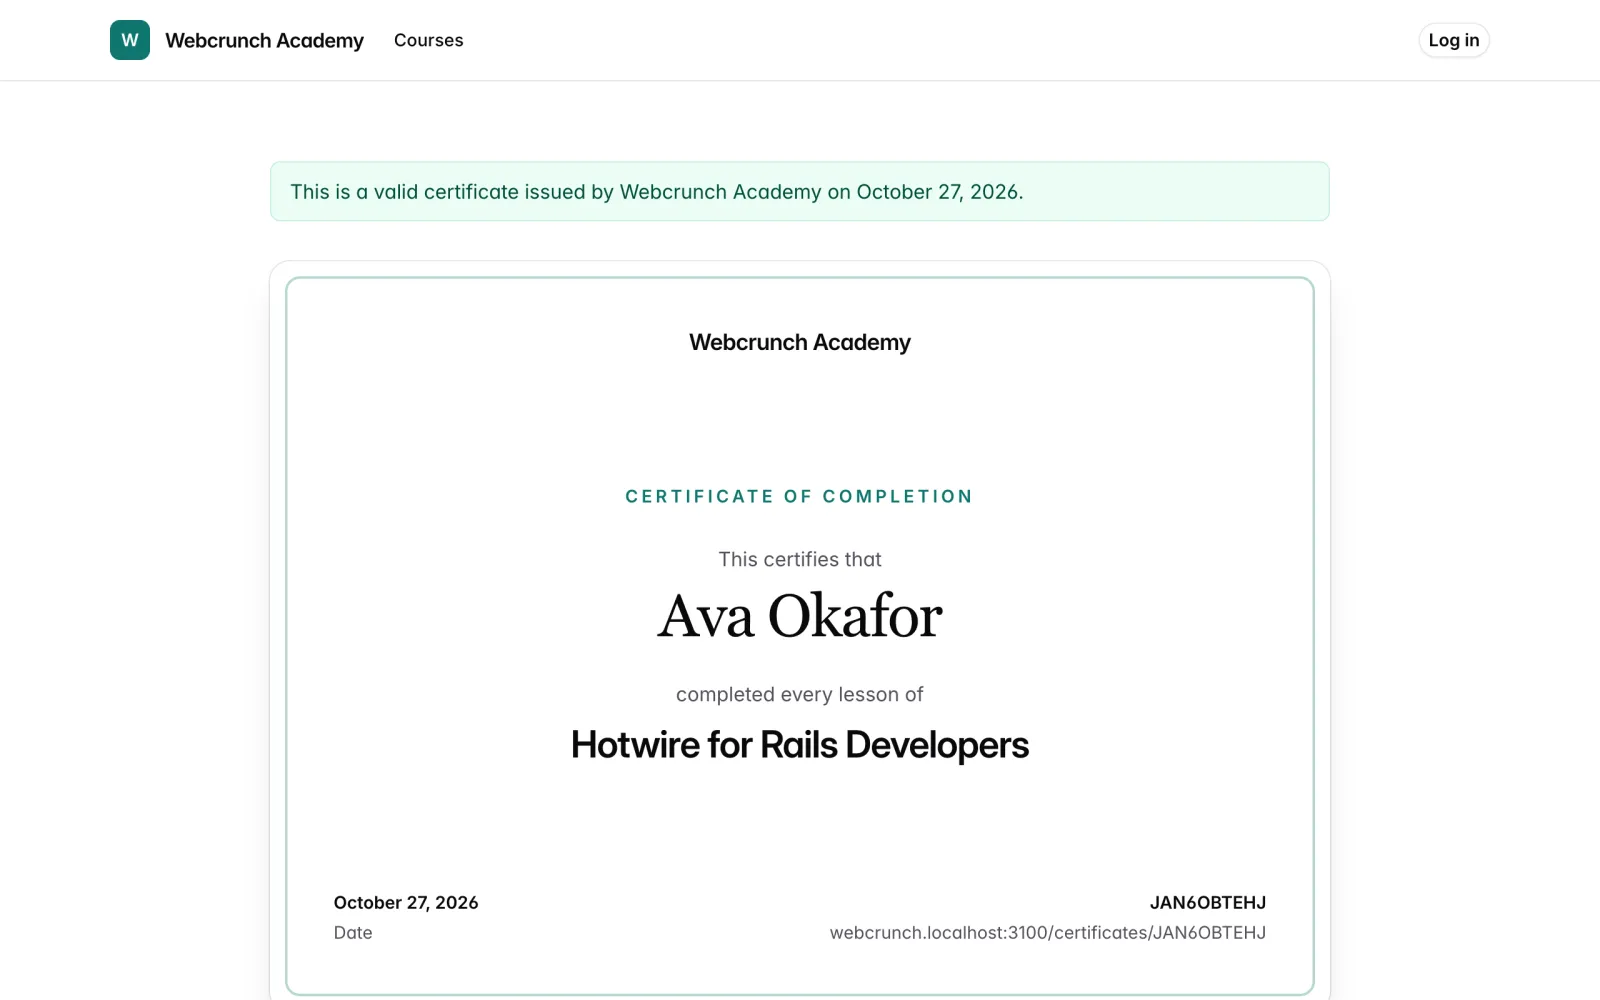
- The certificate shows your workspace name and logo, "Certificate of completion", the student's name, the course title, the date and a certificate number. The student can print it or save it as a PDF.
- Each certificate has a public link,
/certificates/<number>on your course site, where anyone can check it: "This is a valid certificate issued by" your workspace. Students can share it, for example on a CV. - A certificate keeps the name and course title it was issued with, even if you rename the course later.
- Lessons added after a student finished don't take away a certificate they already have.
- Removing a student's access or refunding them doesn't cancel a certificate already issued.
Reviews
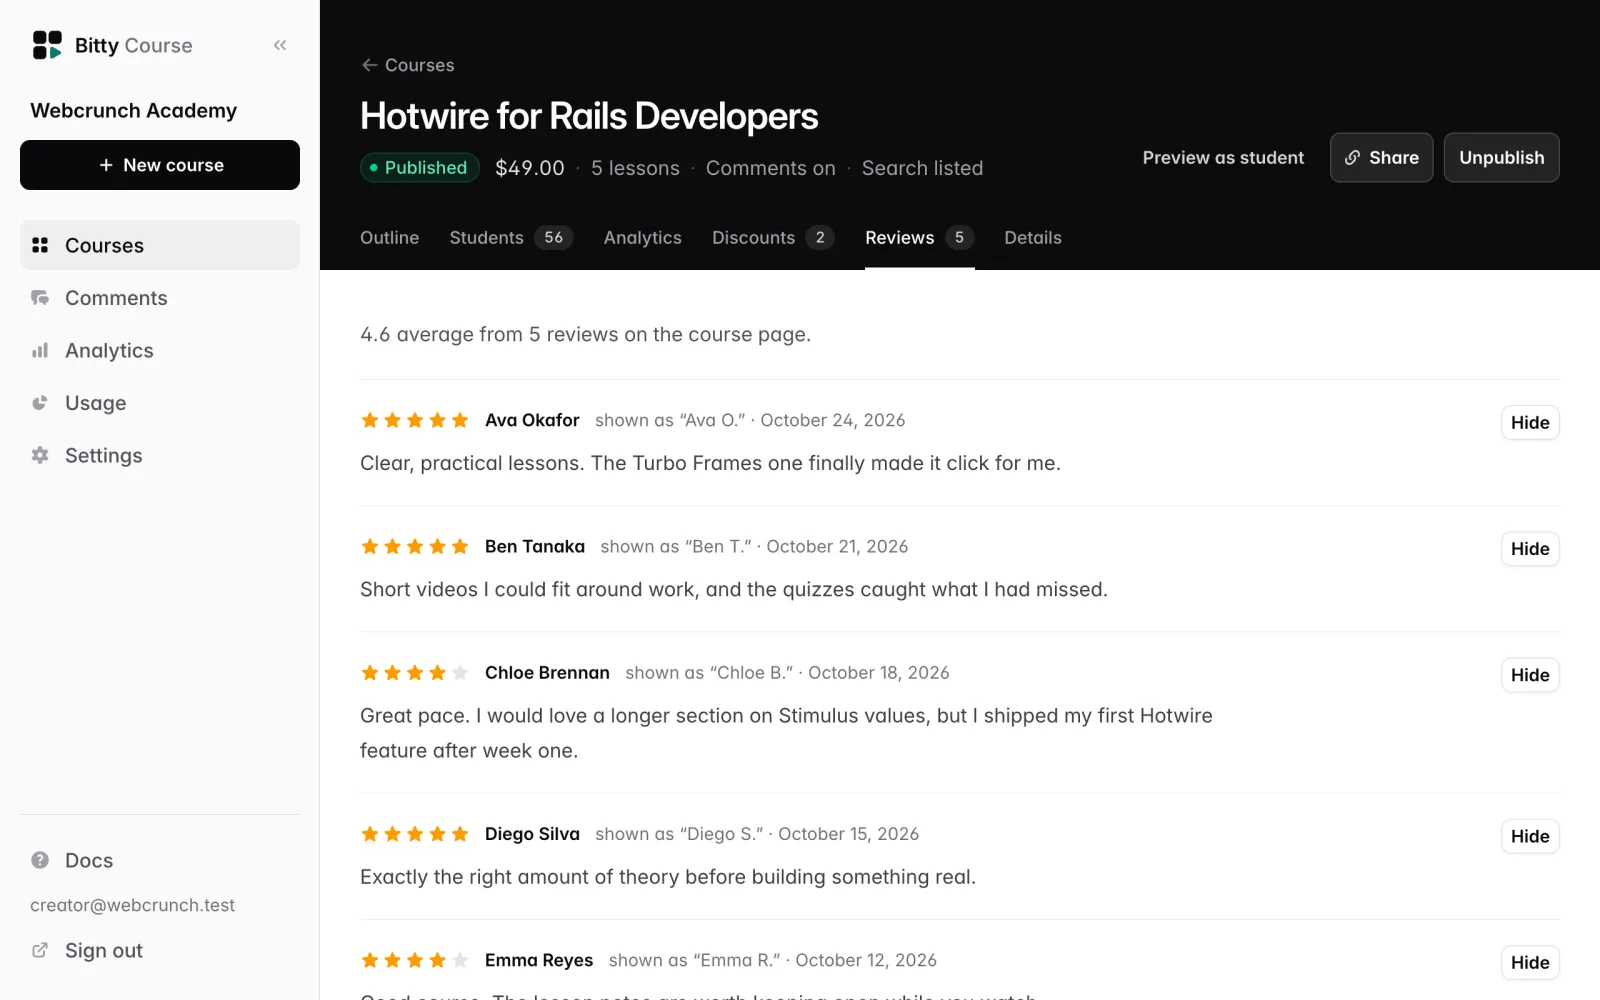
Turn on Show student reviews in the course's Details tab. A Reviews tab then appears next to Discounts.
- Students with access who have completed at least one lesson see Review this course at the bottom of the course page. They pick 1 to 5 stars and can add up to 2,000 characters.
- Each student has one review per course. They can change it (Update review) or Delete my review at any time.
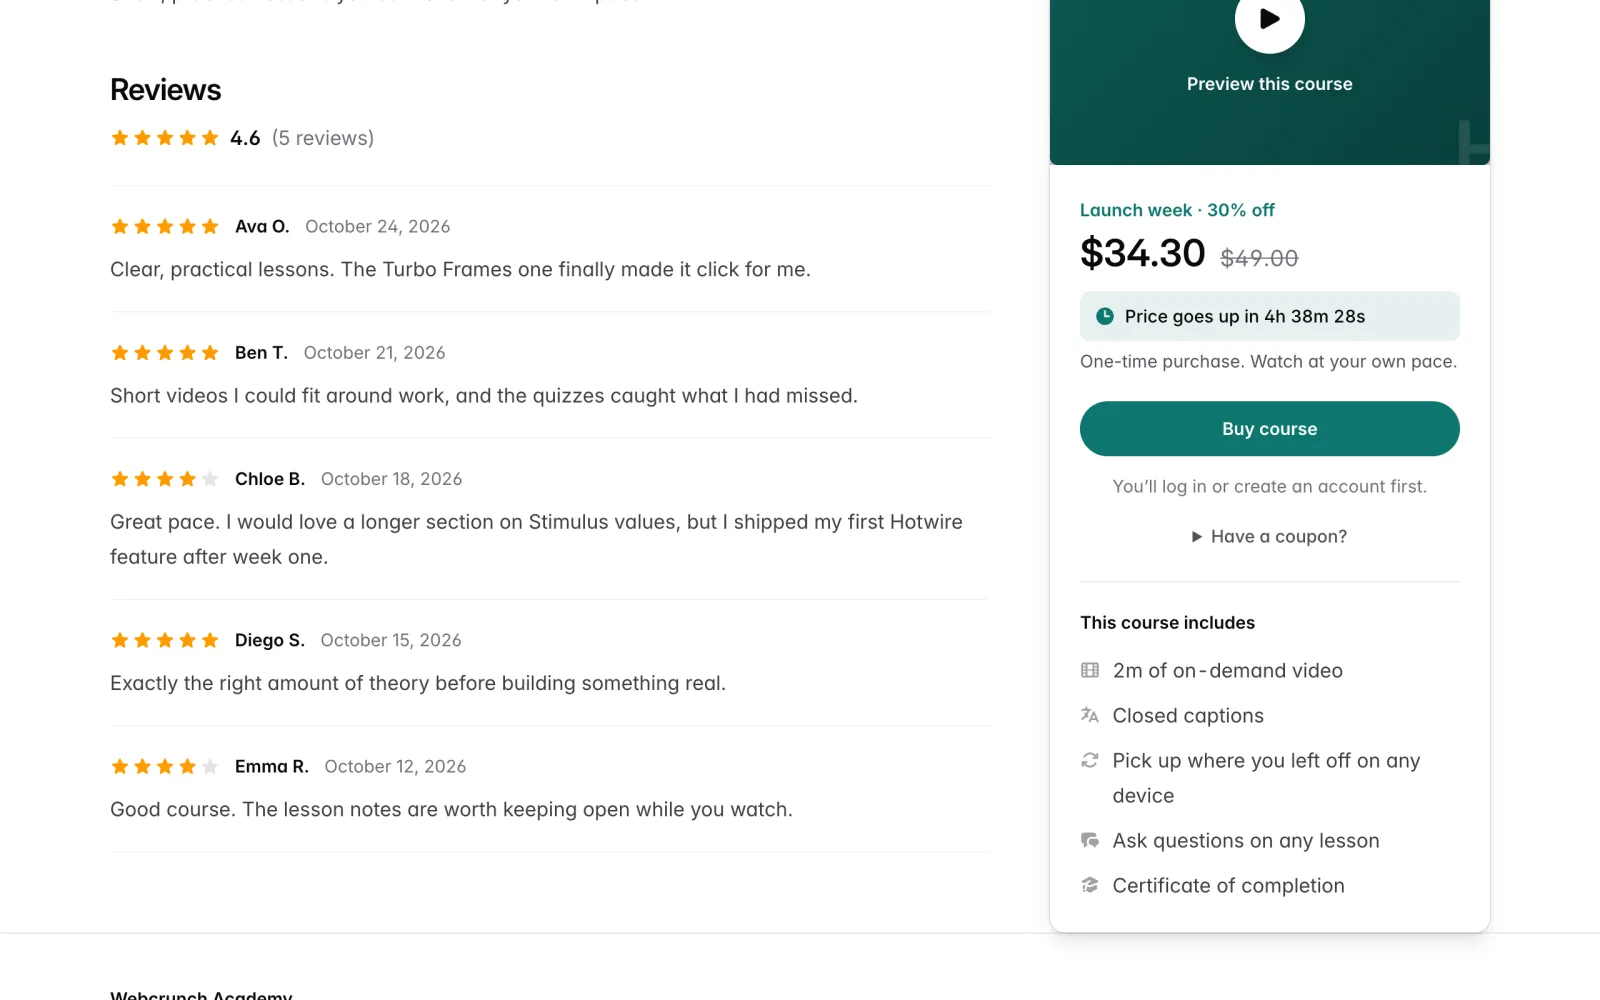
- The course page shows the average rating, the number of reviews and the 10 newest. Each review shows the student's first name and last initial, for example "Ada L.", and the date. The form tells the student how their name will appear.
- In the Reviews tab you see every review with the student's full name. Hide removes a review from the course page and the average; Show brings it back. A student whose review is hidden sees "The creator has hidden your review from the course page." You can't edit or delete a student's review.
- Turning reviews off hides them all from the course page without deleting them.
Preview as a student
Click Preview as student on the course page, or on any lesson's editor. The preview:
- shows the course page and lessons with your brand, as students see them,
- works for draft courses and lessons not yet ready,
- shows quizzes as currently drafted, and lets you submit them without saving anything,
- disables the buy and enroll buttons,
- is visible only to members of your workspace and never creates an enrollment.
Click Back to studio in the banner to return.
Publish and unpublish
Click Publish on the course page. The button is disabled while anything blocks publishing; the Before you publish card lists what is left:
- Add at least one lesson.
- "Lesson title" needs a ready video (or mark it text-only). A video lesson needs a live video, unless you tick Text-only lesson in its editor.
- "Quiz title" needs its quiz published.
- Set a price of at least 1.00 (paid courses).
- Connect Stripe in Settings → Payments to sell this course (paid courses).
- This workspace is read-only after cancellation.
- Your plan's limit on published courses is reached. The Free plan includes one published course; paid plans have no limit. Unpublish another course or upgrade (see Plans and usage).
When nothing is blocking, the card says Everything is ready.
To take a course offline, click Unpublish and confirm. The course goes back to draft. Nobody can open it, including enrolled students, until you publish again. Enrollments and purchase records are kept.
Owners and editors can both publish and unpublish (see Team).
Share a course
Click Share on the course page. The dialog shows:
- Course link, with a copy button. Before publishing, the link is reserved for this course and shows "not available". After publishing, it stays the same as you edit lessons and replace videos.
- Open the course page (published courses).
- With a coupon applied: ready-made links for each live coupon on a published paid course. If there are none, a Make a coupon link. See Coupons and sales.
- Whether the course is listed in search, and why.
- A reminder that the link never grants access by itself: students buy, enroll or are invited, and free-preview lessons are open to everyone.
The course link uses your custom domain once one is connected (see Custom domains).
Delete a course
Only workspace owners can delete a course.
- Open the course's Details tab.
- Under Delete course, click Delete this course and confirm.
Deleting removes the lessons, enrollments and comments, and removes the videos from the video service so they stop counting toward your storage. It can't be undone.
You can't delete a course when:
- anyone has bought it (including purchases that were later refunded), or
- a checkout for it was opened in the last day, since it can still be paid.
In those cases, unpublish the course instead. Purchase records stay intact.
Good to know
- A read-only workspace (after a canceled subscription) can't create, edit, publish or delete courses. It can still unpublish them.
- Lesson links (
<course link>/lessons/<number>) never change when you replace a video or republish a quiz. - AI assistants connected to your workspace can create and edit courses too. See MCP server.
- You can't duplicate a course or move a course to another workspace.