Video
Uploading video
How to upload lesson videos, which files are accepted, what each upload state means, and how uploads count toward your plan's storage.
You upload videos in the studio, in your browser. Each file goes straight from your browser to the video service in resumable pieces, so a dropped connection doesn't mean starting over. Owners and editors can upload.
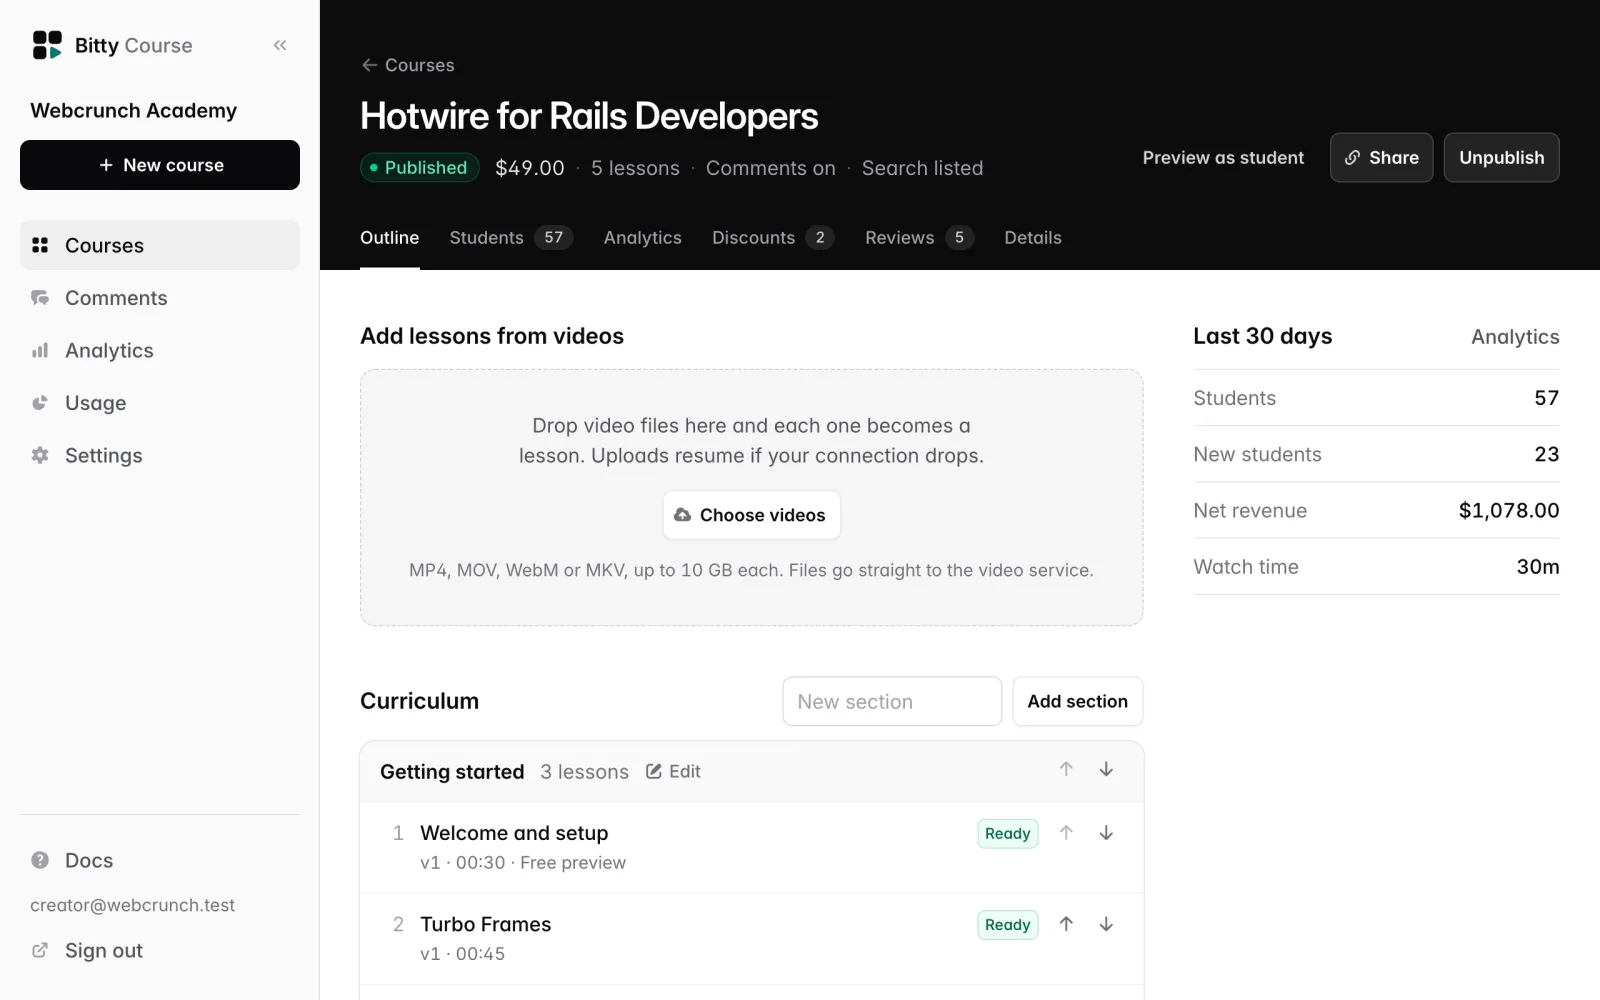
Upload videos as new lessons
Use this when you're building a course: every video you drop becomes its own lesson.
To start a new course from videos:
- Click New course.
- Optionally type the course title where it says "What are you teaching?".
- Drop your video files on Drop your videos to start, or click Choose videos.
The course is created, the files join the upload queue, and the course page opens once they've been sent. Keep the tab open until then.
To add lessons to an existing course:
- Open the course. You land on its Outline tab.
- Drop files on Add lessons from videos, or click Choose videos.
How the lessons are made:
- Lessons are created in file-name order, counting numbers the way people do: "2 Setup" comes before "10 Wrap up". Number your files to control the order.
- Each lesson is named after its file, without the extension, with dashes and underscores turned into spaces. You can rename it afterwards.
- New lessons go into the course's last section. If the course has no sections yet, a section called "Lessons" is created.
- A lesson appears in the outline as soon as its upload starts, before the video is processed.
- A lesson's first video goes live automatically as soon as it's ready.
To arrange lessons afterwards, see Sections and lessons.
Upload a video to one lesson
- Open the lesson and go to its Video tab.
- Click Upload video (or Upload a new version if the lesson already has one) and pick a file.
If the lesson already has a live video, the new upload becomes a new version that you preview and publish yourself. Students keep watching the current video until then. See Video versions.
Accepted files and size limit
- Formats: MP4, MOV, WebM and MKV (M4V also works).
- Up to 10 GB per file.
- The file type your computer reports is only a first check. The video service decides whether the file is really a playable video. If it can't process it, the upload ends as Failed with the reason.
Files that are too big or the wrong type are refused before anything is sent, with a message such as "file is larger than 10 GB."
The upload tray
Every upload in the studio goes through one queue, shown in a tray at the bottom right of the screen. Files are sent one at a time. You can keep working on other studio pages while the queue runs; the tray stays put.
The tray shows overall progress ("Uploading 2 of 5") and one row per file with its state:
| State | Meaning |
|---|---|
| Waiting | In the queue, not started yet. |
| Starting | Bitty Course is checking the file and your storage, and preparing the upload. |
| Uploading | Being sent, with a percentage. |
| Processing | Fully sent. The video service is preparing it for playback. |
| Ready | Playable. The lesson updates on its own. |
| Failed | Something went wrong. The row says why. |
| Canceled | You canceled it. |
"Already uploaded" next to Ready means you dropped a file that was already uploaded to the same place, so nothing was sent again.
Each row has a Cancel button while the file is waiting, uploading or processing, and a Retry button when it failed. When nothing is in progress, close the tray with its X button.
If your connection drops or you close the tab
- Connection drops: the upload retries by itself a few times. If it still fails, click Retry and it resumes where it stopped.
- Closing or reloading the tab: this stops anything still being sent. The browser asks you to confirm first. To continue, drop the same file again in the same place (the course's drop area, or the same lesson's Video tab). Bitty Course recognizes the file by its name, size and last-modified time, and doesn't create a second lesson. In the same browser, the upload continues from where it stopped.
- After a file is fully sent, processing continues even if you close the tab.
- Each upload has to finish within 24 hours of starting. After that it fails with "The upload didn't finish before its authorization expired." Drop the file again to start over.
Processing states in the studio
On a lesson's Video tab, each version shows a badge: Pending upload, Uploading, Processing, Ready, Failed, Canceled or Expired. The version students see is marked Live instead.
On the course's Outline tab, uploads that are still in flight or that failed are listed under Processing and problems. For a failed upload, drop the same file again to retry, or click Cancel.
Canceling an upload that created a brand-new lesson also removes that lesson, as long as you haven't added anything else to it.
Storage and your plan
Video storage is measured in hours of video, not file size.
| Plan | Video storage |
|---|---|
| Free | 2 hours |
| Starter | 20 hours |
| Plus | 40 hours |
What counts:
- Every live video.
- Earlier and unpublished versions that are still kept. See Video versions.
- Uploads in progress. Before a video's length is known, it reserves 30 minutes of storage per GB of file size. Once it's processed, its real length counts instead.
When storage is full, new uploads are refused with a message that your plan's video storage is full. Nothing is deleted and existing videos keep playing. To make room, delete lessons you no longer need or change plan. Your current totals are on the Usage page. See Plans and usage.
Good to know
- Captions are generated automatically once a video is ready, if automatic captions are on. See Captions and translations.
- A canceled workspace is read-only: uploads are refused until an owner reactivates it.
- There is no import from a URL, YouTube or cloud storage: every video is uploaded as a file. An AI assistant connected through MCP can also upload video files to lessons for you.
- Quiz lessons don't have videos.