Build your course
Custom domains
Use your hosted subdomain or connect your own domain, with the exact DNS records, verification states, and what happens when checks fail.
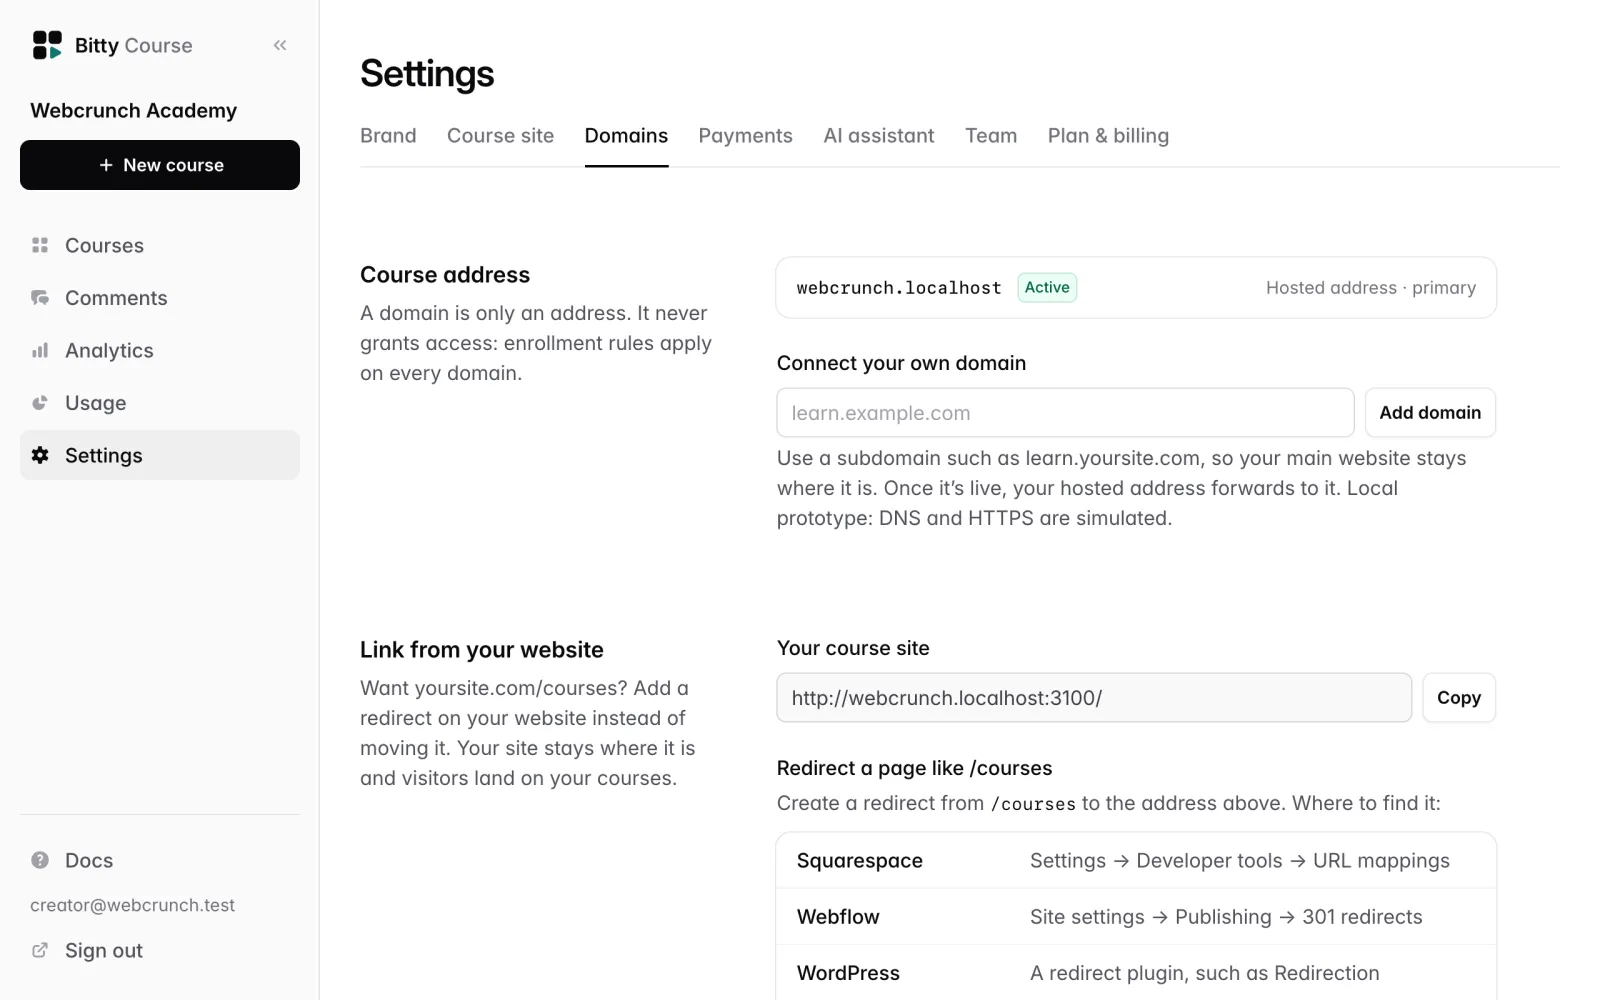
Every workspace gets a hosted address: the subdomain you chose when you created the workspace, on Bitty Course. On the Starter and Plus plans you can also serve your course site from your own domain, such as learn.yoursite.com. Both are managed in Settings → Domains.
A domain is only an address. It never grants access: enrollment rules apply on every domain, and the same student needs the same enrollment whichever address they use.
Hosted address vs custom domain
| Hosted address | Custom domain | |
|---|---|---|
| Plans | Every plan, including Free | Starter and Plus |
| Setup | None; it works from the start | Two DNS records at your domain provider |
| HTTPS | Included | Set up automatically once DNS is right |
| Can be changed | No, it's fixed at workspace creation | Add and remove domains any time |
On the Free plan, Settings → Domains says: "Your own domain, like learn.yoursite.com, is included on paid plans. Your hosted address above works on every plan." See Plans and usage.
Connect your own domain
Only workspace owners can add, check or remove domains.
- Go to Settings → Domains.
- In Connect your own domain, enter the hostname, for example
learn.example.com. You can paste a full URL; the path is dropped. - Click Add domain. The domain appears with a Pending badge and the DNS records to create.
- At your domain provider, add the two records exactly as the page shows them:
- A TXT record. Name:
_bittycourse-verify.learn.example.com. Value: a token startingbittycourse-verify=, unique to your domain. This proves you own the domain. - A CNAME record:
learn.example.compointing to the target hostname shown on the page. This sends visitors to Bitty Course. If you use Cloudflare, set it to "DNS only" (grey cloud) so HTTPS can be issued.
- A TXT record. Name:
- Wait, or click Check now. Bitty Course checks new domains automatically every 10 minutes for a week and emails the workspace owners when the domain is live. HTTPS is set up automatically.
Bitty Course never changes your DNS for you.
Use a subdomain such as learn.yoursite.com, so your main website stays where it is.
What's accepted
The hostname must be a public domain name with at least two parts. Not accepted:
- IP addresses, ports, wildcards (
*.example.com) or usernames - non-ASCII names; enter internationalized names in their
xn--form - Bitty Course's own addresses
- a domain already connected to another Bitty Course site ("is already connected to another Bitty Course site")
- the same domain twice in one workspace ("is already added")
Verification states
Each domain shows a status badge and an HTTPS status.
| Status | Meaning |
|---|---|
| Pending | Waiting for the TXT record |
| Verified | The TXT record matched. Ownership is proven; waiting for HTTPS. |
| Active | Live. Your course site is served on this domain with HTTPS. |
| Error | Something needs fixing. The message under the domain says what. |
HTTPS shows as not requested, pending, issued or failed.
While a domain isn't active, the DNS instructions stay on screen, along with the latest message:
| Message | What to do |
|---|---|
| "No TXT record found yet at _bittycourse-verify.[domain]. DNS changes can take a while." | Add the TXT record, or wait for it to spread. |
| "A TXT record exists but its value doesn't match this site's token." | Copy the value from Settings → Domains again. Each domain has its own token. |
| "Ownership verified. Waiting for HTTPS: make sure the CNAME points to [target]. We keep checking automatically." | Add or fix the CNAME record. |
| "The HTTPS certificate couldn't be issued. Check the CNAME record, then re-check." | Fix the CNAME (and Cloudflare's "DNS only" setting), then click Check now. |
| "This domain was verified by another Bitty Course site first." | Another Bitty Course workspace proved ownership of this domain first. |
| "DNS lookup failed (...). Try again shortly." | A temporary lookup problem. Click Check now later. |
If two workspaces add the same domain, nothing is reserved until one proves ownership with the TXT record. The first to prove it gets the domain.
New domains are checked automatically for 7 days. After that, click Check now to check again.
When a domain goes live
- The owners get an email: "[domain] is live".
- Your hosted address keeps working and forwards course pages to your domain, so existing links don't break.
- Students who were signed in on the old address are asked to sign in once more on the new one.
- The domain shows Primary. If you have several active domains, the first one that went live is the primary, and the others forward to it.
Forwarding applies to pages. Video players, images, and lessons embedded on other sites answer on whatever address they were given. Course page forwarding is cached by browsers for a day, not permanently, so it can change back if the domain stops working.
When checks fail later
Bitty Course re-checks live domains every 10 minutes. If a domain stops reaching Bitty Course over HTTPS three checks in a row:
- The domain goes to Error with "[domain] stopped reaching Bitty Course over HTTPS. Check that its CNAME still points to [target]. Your hosted address is being used meanwhile."
- Your course site is served on your hosted address again.
- The owners get an email: "[domain] stopped working".
Bitty Course keeps checking. Once the CNAME works again, the domain comes back on its own, even if you've deleted the TXT record since, because ownership was already proven. A single failed check changes nothing.
Usually the DNS record was edited or the domain lapsed.
Remove a domain
Click Remove next to the domain and confirm. Course links on that domain stop working; your hosted address keeps working.
Link from your existing website
If you'd rather keep your site's own address, such as yoursite.com/courses, the Link from your website section helps without moving anything:
- Redirect a page like /courses: create a redirect from
/coursesto your course site address, shown with a copy button. The page lists where to find redirects in Squarespace, Webflow, WordPress and Wix. - Or add a button: copy the View courses button HTML, in your brand color, and paste it into an HTML or embed block on any page.
Good to know
- A custom domain is not an access control. Lessons, attachments, captions and comments always require an enrollment (or a free preview lesson), on every address.
- Before switching to the Free plan, remove your custom domains; Plan & billing asks you to.
- Editors can view Settings → Domains but can't add, check or remove domains.
- While the workspace is read-only after canceling, you can't add or check domains.
- Embedding lessons on your own website is a separate setting on each course: Sites allowed to embed lessons. See Playback and security.